Take Your Renovation Skills to the Next Level with this Curated List of Home Improvement Projects
When you’re ready to move beyond entry-level tasks, it’s time to tackle more ambitious and rewarding DIY house renovation ideas. Advanced projects often involve structural changes, complex layouts, and greater attention to alignment and precision. These home improvement projects not only expand your skillset but also make significant visual and functional improvements to your home.
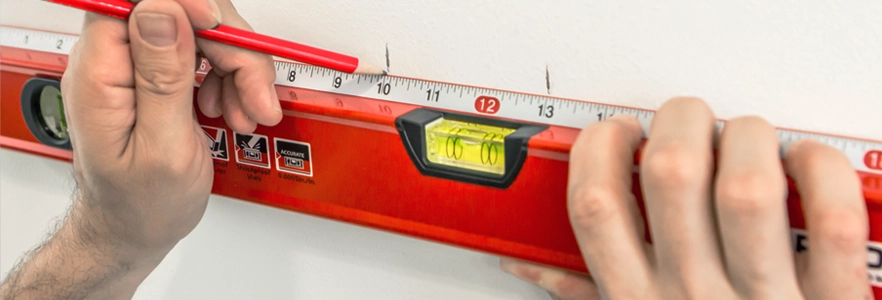
The right, professional-grade measuring, leveling, and layout tools make a real difference. From digital angle finders to laser levels and long straight edges, having the right gear ensures your hard work results in flawless finishes.
5 Advanced Home Improvement Projects You Won’t Regret Investing in
1. Frame and Trim a Feature Wall
Want to give a plain wall stunning depth and character? Framing and adding trim to create a feature wall, such as board-and-batten or picture-frame molding, is an excellent DIY project. It enhances texture and class to any living space. This task focuses on skills such as layout strategy, pattern symmetry, and finish carpentry techniques.
How to Do It:
- Plan your design by measuring the entire wall and sketching a layout on graph paper or using a digital design tool.
- Calculate the spacing between vertical and horizontal trim boards. Use a laser level to project lines across the wall, ensuring your design is even.
- Mark trim locations directly on the wall using a pencil and a straight edge.
- Use a miter saw to cut all pieces – measure twice before each cut! A digital angle finder ensures precise corner angles, especially in non-square rooms.
- Apply construction adhesive to the back of each trim piece and press it to the wall. Secure with a finish nailer.
- Fill nail holes with wood filler, sand all joints smooth, and caulk edges for a clean transition.
- Prime and paint the entire wall, including trim, for a seamless and polished finish.
Tip: Want to add even more flair? Choose a contrasting paint color between trim patterns to create bold dimension, or apply wallpaper inside each panel for added texture and interest. Consider installing wall sconces, gallery lighting, or small floating shelves within the design layout to bring extra functionality and visual pop to your new feature wall.
2. Install New Kitchen Cabinets
There’s really nothing as significant in a kitchen remodel as a cabinet upgrade. Installing new kitchen cabinets transforms your kitchen’s aesthetics significantly, and if done intelligently, can also give you so much more of that cherished pantry space. While this type of project demands planning, accuracy, and attention to alignment and support, it’s a perfect upgrade for advanced DIYers.
How to Do It:
- Carefully remove old cabinetry. Use a utility knife to score caulk lines and avoid wall damage.
- Locate and mark wall studs using a stud finder. Draw horizontal reference lines where the base and upper cabinets will be mounted, using a laser level for accuracy.
- Begin with the upper cabinets. Use a cabinet jack or a temporary support ledger to hold cabinets in place while you fasten them to wall studs.
- Check for level and plumb after mounting each cabinet. Use shims behind the cabinet as needed.
- For base cabinets, start in the corner. Align to the wall and adjacent cabinets, adjusting height with shims to ensure a level countertop surface.
- Once all cabinets are secured, install toe kicks, filler panels, and hardware.
Tip: For a personal design touch, you can install under-cabinet lighting for a touch of luxury and comfort – especially useful for nighttime kitchen tasks. LED strip lighting offers a clean, modern look and can be easily installed using adhesive backing or mounting clips.
You might also consider decorative trim moulding along the cabinet tops or bottoms to give your installation a built-in, polished aesthetic.
3. Build a Custom Walk-In Closet System
There’s no argument here, custom closets add luxury and practicality to your daily routine. This project focuses on maximizing vertical storage, perfecting wall mounting, and integrating multiple fixtures into one cohesive system so your storage system can offer you the best use of space.
How to Do It:
- Measure your closet space thoroughly. Plan the zones: hanging areas, shelving, drawers, and accessory storage.
- Sketch your design with height placements and spacing, factoring in clearance for door openings and lighting.
- Mark layout lines for panels, shelves, and hanging rods on the walls using a long level or laser tool.
- Install vertical side panels first, ensuring they’re anchored to wall studs. Use a level to make sure they’re standing straight up.
- Mount shelf brackets and install horizontal shelving, using a tape measure to ensure even spacing.
- Add drawer units, rods, baskets, and finishing touches like LED lighting for full functionality.
Tip: Consider adding glass-front drawers or display shelves for handbags and accessories. Use motion-sensor LED lights inside cabinet sections to illuminate automatically when doors open. You can also add a statement mirror or wallpaper accent inside the closet to give the space a boutique-like appeal.
4. Replace Interior Doors and Align Frames
Interior door replacement improves aesthetics, privacy, and noise control. A misaligned door can cause jamming, swinging, or just be plain unsightly. Luckily, this is a fix you can DIY if you have the right tools.
How to Do It:
- Remove the existing door and trim. If reusing the frame, inspect for damage or warping.
- For a full replacement, you’ll need to build or purchase a pre-hung door and frame.
- Use a long spirit level to ensure the new door frame is plumb. Insert the frame into the rough opening and temporarily brace it with shims.
- Check the spacing around all sides of the door. Gaps should be even, typically around 3 mm along the sides and top.
- Secure the frame by screwing through the shims and into the wall studs. Recheck plumb and square after each fastener.
- Hang the door on its hinges and test for smooth operation. Adjust as needed before adding trim.
Tip: You can easily update your door’s look with stylish new handles. Or, for a more custom look, paint or stain your door in a bold or unexpected color, or add decorative trim panels to enhance its design.
5. Build a Custom Mudroom Setup
Creating a well-organized mudroom is one of the most practical and visually satisfying home upgrades. Not only does it provide a designated drop zone for shoes, coats, and backpacks, but it also helps keep your living areas clean and clutter-free. This project combines carpentry, storage strategy, and design-forward thinking into one rewarding weekend renovation.
How to Do It:
- Choose a wall or nook near your entryway to dedicate as your mudroom space. Measure the full width and height to determine how much storage you can include.
- Sketch a layout that includes seating (like a bench), storage cubbies, coat hooks, and upper shelves. Leave room for baskets or bins as needed.
- Use a laser level and tape measure to mark your layout directly on the wall, ensuring even spacing and alignment.
- Start by building the bench base. Use 38×89 mm timber for framing and plywood for the seat. Secure to the wall and floor with screws.
- To separate storage zones, install vertical panels or dividers above the bench. Secure them to wall studs and check with a level to ensure they are perfectly upright.
- Add cubbies or open shelving above the panels for baskets and bins, followed by mounting coat hooks at an accessible height.
- Prime and paint or stain all components for a unified look.
Tip: Upgrade your mudroom by using beadboard or shiplap backing for added texture. Consider painting cabinetry in a contrasting or deep tone, and style the bench with comfy, colorful cushions or seasonal décor. A few well-placed, woven or canvas baskets or colorful, labeled bins can make this space feel like a designer-organized drop zone

The Value of Professional Tools for Advanced DIY Home Improvement Projects
Investing in high-quality tools transforms the entire renovation process. Rather than fumbling with outdated gear or making costly errors due to poor alignment, professional tools simplify every step. Not only do they save you valuable time and reduce frustration, but they also help you achieve cleaner, more reliable results. Ultimately, better tools lead to fewer mistakes, a more enjoyable workflow, and a finished project you can take real pride in.
Kapro offers a variety of high-precision instruments that cater to every step of your home improvement projects. From vision to execution, the right tools make all the difference. Head over to Kapro.com and equip yourself for your next great DIY project.